Sucker for a succulent? Or maybe you’re a big fan of the FEJKA?
Plant décor is a huge trend right now. And rope plant hangers are one of the best ways to display your favourite flora and take your indoor and outdoor greenery up a level… literally.
Here we’ve put together a quick step-by-step guide on how to make a macramé hanging basket. Don’t let the word ‘macrame’ put you off. This isn’t a complicated and fiddly pattern from the 70s. It’s super chic and super simple (even for an absolute beginner) and costs less than £10 to make!
So why not have a go?
Stock up on some jute rope, start knotting and send us a photo of the results.
What will I need to make a macramé plant holder?
Of course, to make a rope hanging basket, you’re going to need some string or rope. Here at RopesDirect, we have a fantastic range of products that are perfect for this type of project – including jute rope, cotton rope, sisal twines and more. These are all excellent quality and affordably priced. And they can be quickly and easily ordered online and delivered to your home address.
You will also need:
- a terracotta or ceramic plant pot
- a small plant (preferably one that’s easy to care for!)
- potting soil
- a screw hook
- tape
All of which can be found at your local DIY store or gardening centre.
4 easy steps to make a simple rope hanger
Step 1 – Cut the rope to size

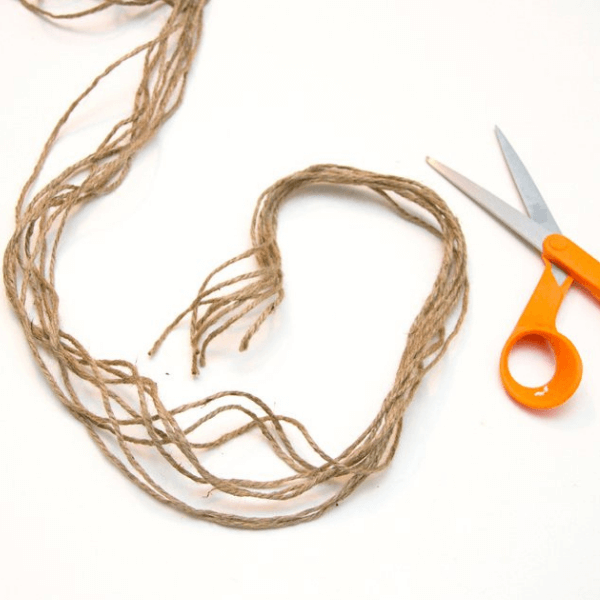
To create this stylish yet simple rope hanger, you will need to cut eight pieces of rope – all of an equal length.
The ideal length will depend on the specific plant pot you have chosen. Generally speaking, the bigger the pot, the longer your rope will need to be. But you’ll also need to add a little extra for the knots, and to ensure there’s plenty of excess to hang your planter with.
Tie all eight strands together with a secure knot, several inches before the end.
Step 2 – Secure the rope to the base of the pot

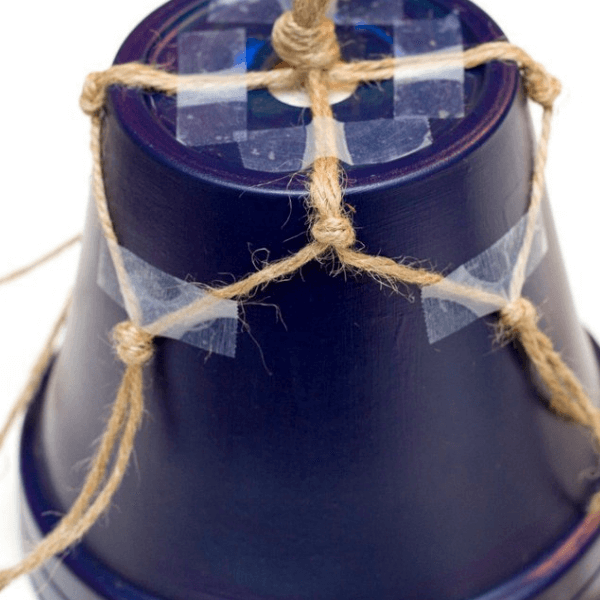
Turn the pot upside down and place the knot at the centre, then divide the strands into four groups of two. This will divide the bottom of the pot into equal quarters.
Secure these strands into place using small pieces of sticky tape. Then, tie a small knot in each group, just past the edge of the base. At the end of the project, when the pot is turned back upright, these knots should be visible.
Step 3 – Create the knots

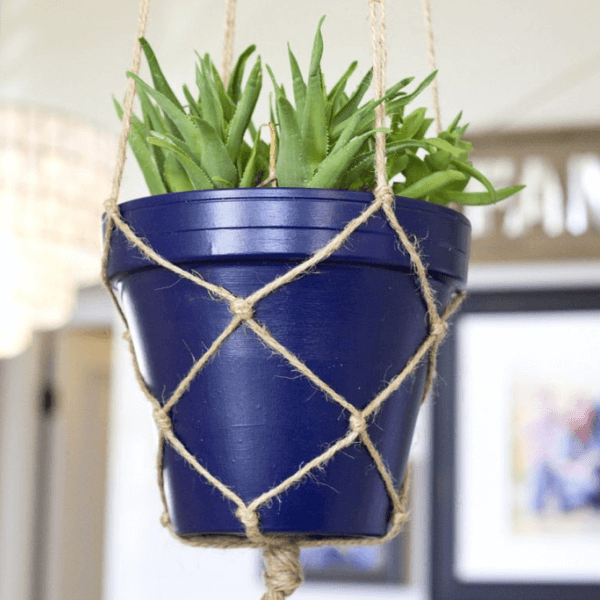
You’re now ready to start knotting together the rope plant hanger. Take one rope from the first group and one rope from the adjacent group and tie these together with a knot. Ensure this is directly between the two upper knots. And repeat the process, moving all the way around the pot, until the first row is complete.
To remove any slack, pull the rope very gently and secure each knot in place with a little bit of sticky tape. This tape will be later removed, but by keeping the rope in place, it will make subsequent rows easier to knot together.
Move on to complete the next row of knots in exactly the same way. The number of rows required will, again, depend on the size of your pot. But for all projects, we recommend leaving a ½ inch gap between the last row and the top edge.
Step 4 – Tie it together and hang

Last but not least, turn the pot over again and tie all eight strands of rope together with one knot. The knot can be tied at whatever height you like. Just double-check that all ropes are of an even length (therefore allowing your pot to hang level). And if they are, trim off any excess and remove all the sticky tape.
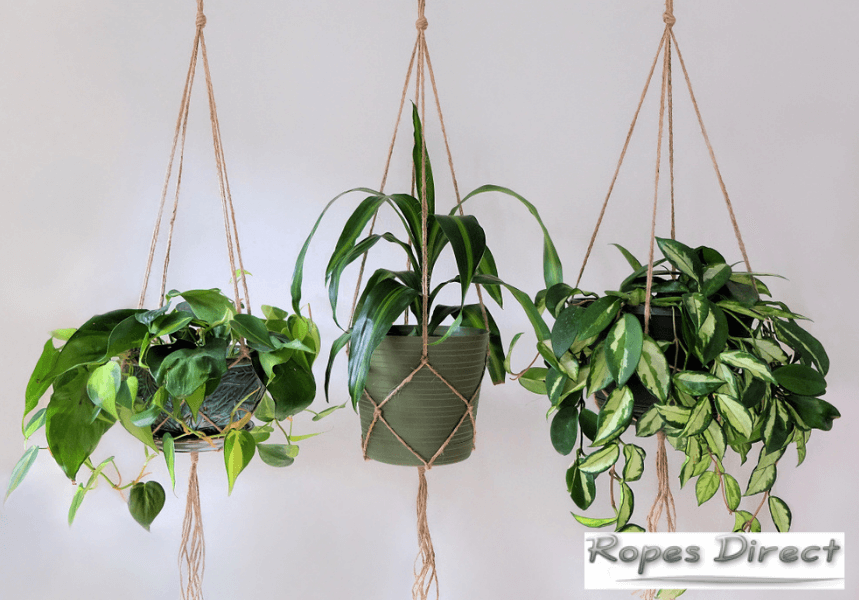
When it comes to hanging your new macramé plant holder, you have a couple of options. You can either hang the rope directly from the screw hook. Or for a more elegant and professional finish, tie the rope to a wooden ring and use this to hang it in place.
Start making your rope hanging basket today
Eager to start knotting? Choose your succulent, stock up on rope supplies, and create a trendy rope hanging basket for your home or garden. And remember, we always love to see our customer’s handiwork! Send us some pics of the macramé plant holders that you create using our ropes, strings and twines, and we’ll be sure to post some of the best on our website and social media pages.

