About to throw away an old chair? Why not give it a little TLC and weave a rope seat instead?
Upcycling is a great way to cut down waste and breathe new life into tired furniture. What’s more, it’s really easy to do! Just follow our simple guide and create a unique rope chair for your home or business.
Gather your materials
1. Invest in high-quality rope
First things first, you’ll need to stock up on rope. Synthetic hemp rope, nylon rope, flax twine, paracord, and cotton rope are all viable options for a sturdy weave chair. On average, you’ll need two lengths that are approximately 60 metres long each. But this can vary depending on the size of your chair.
2. Grab the essential tools
In addition to high-quality rope, you’ll also need:
- a flat weaving shuttle
- wooden spacers that are the same length as the chair
- a crochet hook and/or weaving needle
These can be found in most craft shops, both online and on the high street – and, if you wish to create a professional finish for your woven chair seat, they’re good to have to hand.
Weave the first side

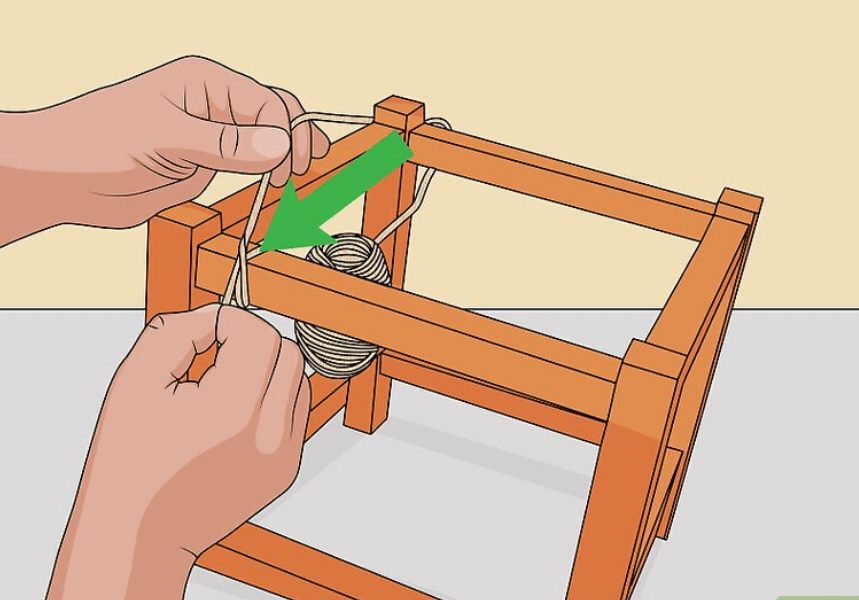
1. Tie the first knot
To start the first section of your rope seat, tie the rope to one of the chair’s seat poles using a clove hitch. It doesn’t matter which side you use – just make sure you slide it all the way into the corner.
For more information on how to successfully tie a clove hitch, be sure to check out our recent infographic ‘Know your Knots’. This offers detailed step-by-step instructions and will ensure your project gets off to the best possible start.
2. Add a wooden spacer
Next, lay a wooden spacer across the seat – perpendicular to your knot. This will maintain some slack in the weave and make it much easier to weave in the opposite direction later on.
3. Wrap the rope
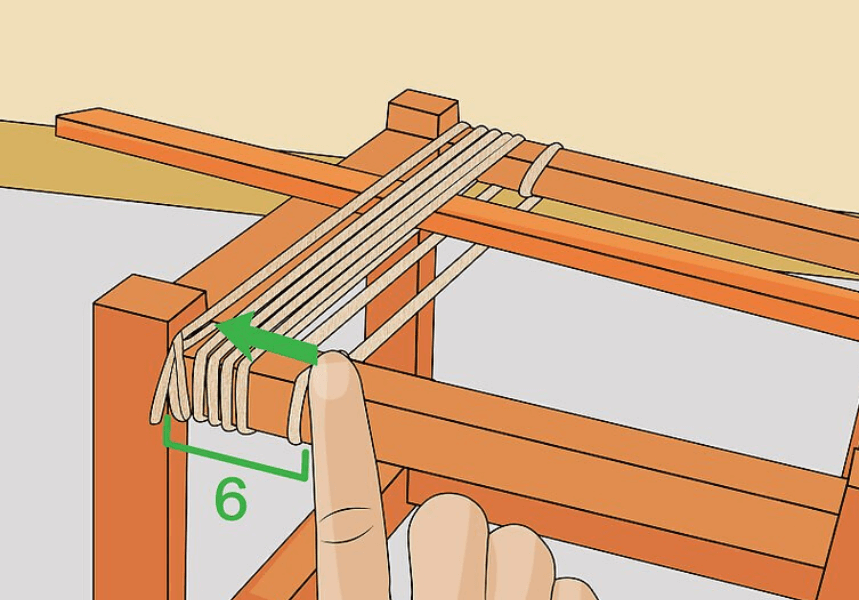
Now you’re ready to start weaving. Wrap the rope around the full width of the chair – taking it over the wooden spacer, around the opposite seat pole and back underneath until it reaches the starting point. This is one loop of your woven rope seat. Try not to pull it too tightly. It needs to be taut enough to hold its shape, but you should also be able to lift it slightly with your fingers.
Create five loops in total. Then, to finish the section, wrap the rope around the seat pole (on each side of the design) and push all five loops together – making sure they don’t crisscross.
4. Repeat
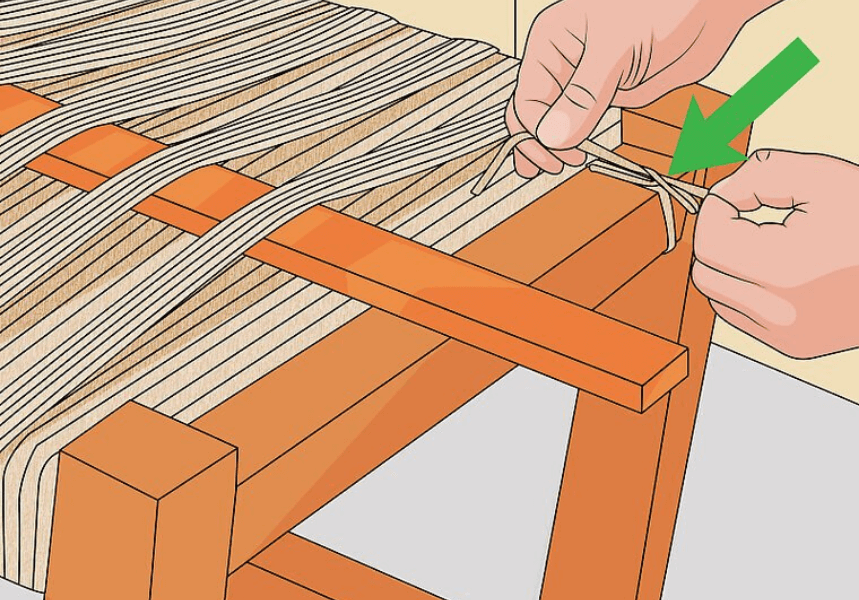
Repeat the process above until the entire rope seat has been covered. The exact number of ‘five loop’ sections that are required will depend on the size of your chair. Once you get to the end, cut the rope – leaving a 5-6cm tail – and use the crochet hook to tuck in the loose strands.

Weave the opposite side
1. Insert the wooden spacers
Before you start the next part of the weave, you need to do a little preparation.
Insert the wooden spacer under the second group of five loops, and subsequently under every other group of five, until you reach the other side. Then, turn the rope chair upside down and insert a second wooden spacer – this time passing it under the other ‘five loop’ groups instead.
2. Tie and wrap the rope

You’re now ready to start weaving in the opposite direction. Take the second length of rope and tie this to the seat pole (perpendicular to the first weave) with another clove hitch.
Using the shuttle, slide the rope under the lifted loops and wrap it around the full width of the chair – bringing it back to the start to make a loop. It’s important to follow the same pattern as before. Create five loops and finish the section by wrapping the rope around each seat pole individually.
3. Tidy up your work
To complete the woven chair seat, again, you will need to repeat this process – moving across the seat and creating the desired checkerboard pattern – until the entire surface is covered.
The last few loops can be a little difficult to weave using the shuttle. Therefore, at this point, it’s worth grabbing the crochet hook. Tuck in the final strands, cut away any loose strands with scissors, and slowly pull out the wooden spacers – taking care not to get them caught on the weave.
If everything is woven and secured correctly, the rope seat should now be sturdy enough to sit on.
Nicky’s tips
Customer Nicky kindly sent us the photos below. She says she found using heavy flax twine worked best for her (photo left). It was easier to work with and looks good. She also said she used a weaving neeedle to help feed the twine into edges and difficult corners. She also restored a similar chair using 5mm hemp (photo right).
Ready to start weaving a rope chair?

Why not check out our online store, here at RopesDirect? We have a wide range of ropes that are perfect for this type of project – including hemp, nylon and cotton rope, to name just a few. All of which are of the highest possible quality and available for a very affordable price.
If you have any questions, or are unsure which type of rope is best for your rope chair, please feel free to get in touch. Our team are always on hand and happy to help. Either give us a call on 01692 671721 or send an email to info@ropesdirect.co.uk and we’ll get back to you as soon as we can.
Images courtesy of WikiHow: https://www.wikihow.com/Weave-Rope-Seats


